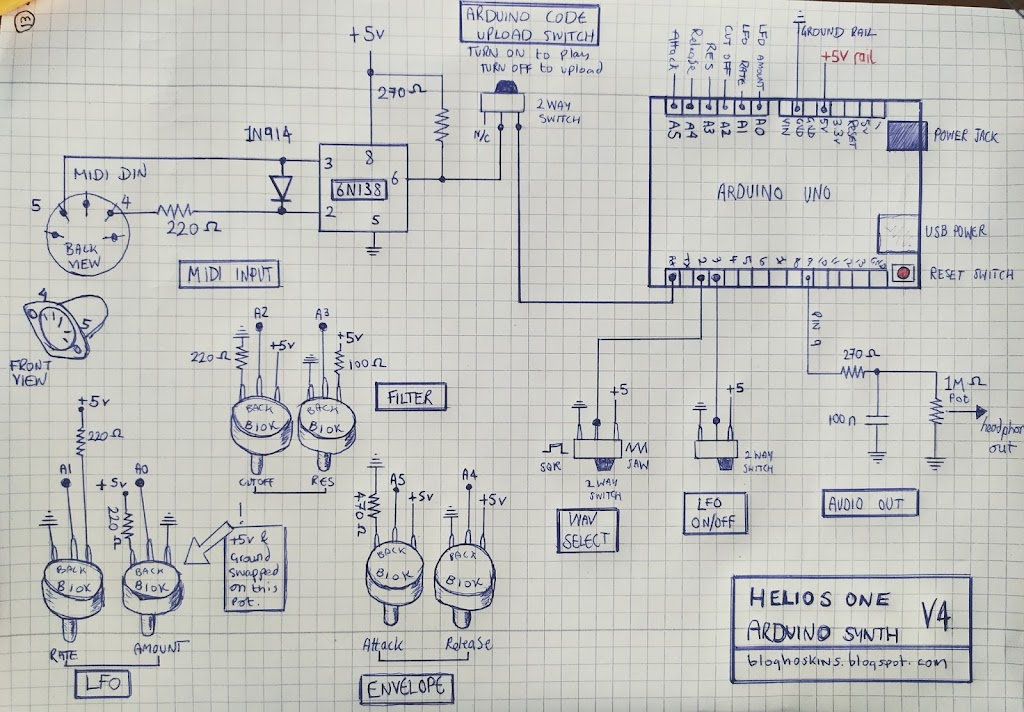
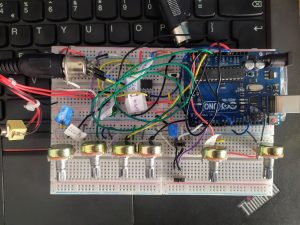
It’s taken a while but part 4 of the code is finally ready. This version adds an LFO, with an on/off switch and two pots controlling the rate and amount;
On top of the previous bill of materials, you’ll need
x2 10k pots
x2 220 Ohm resistors
x1 On/Off switch (2 way)
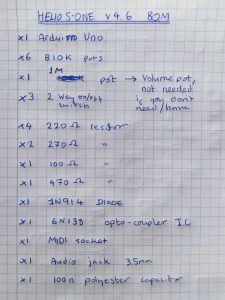
If you’re starting from scratch, here’s the complete BOM:
TIP: Connect the ground for the headphone out as far away from the ground from the 6n138, as it picks up noise.
Code Explanation;
For those wanting to know more about the new code, I’d suggest looking into the following links. The LFO was based on the Mozzi example code ‘State Variable Filter’ (which is a filter that’s being modulated with an LFO), you should load that up, then compare it to these versions where I gradually add pots to the original sketch;
1. State Variable filter with 1 pot added
2. State Variable filter with 2 pots added
Then compare the latest version of the Helios ONE code (v4.6) to the older 3.1 code, to see how it was all added in.
Problems with the code;
The biggest problems were the synth would break into distortion then stop working, and also the filter frequency was changed by the LFO amount. The first problem was solved by trial and error, gradually changing the filter and LFO pot-map values, and also further adding resistors to the pots. I also changed the shift value in the audio update section from 8 to 10. This reduces distortion, but also make the synth quieter. These final values seemed to be the best trade off (feel free to correct me).
Using an Arturia keystep controller while playing the highest notes, with filter on full, LFO on full, it now doesn’t crash. There’s perhaps a touch of distortion, but not enough to worry about. It’s possible due to tolerances between pots/resistors, you might have to slightly change values if you experience problems. (btw. I checked my pots with a multi-meter and picked the ones closest to 10k).
The second problem, where the filter frequency was being changed by the LFO amount, I still haven’t fully solved, unless you count changing from calling it a problem to calling it ‘character’. That seemed like the best solution to me. I think the problem comes from the update audio part of the code, as I wasn’t fully sure how to implement two filters together so I ended passing one through another (SVF & LPF);
| int updateAudio(){ | |
| int asig = (envelope.next() * oscil1.next()) >> 10; // multiplying by 0-255 and then dividing by 256 | |
| int asigSVF = svf.next(asig); // SVF | |
| int asigLPF = lpf.next(asigSVF); // LPF | |
| return (asigLPF); | |
| } |
One day I’ll come back to it a figure it out, but for now it’ll do. Give me a shout if you’ve got the answer.
Is this the final part?
I think for now, the code is finished. The main aim of this synth was to build something as simply and cheaply as possible, but also something that could be considered an instrument. I love the Atari punk console, but this is no harder to build but is far more playable. Hopefully you may have learnt enough to be able to expand the synth yourself (or at least fix my errors). Hint: look at the mozzi examples and steal them
I think you could build this synth for about £10, especially if you were to buy enough parts to make a few. It’s all open-source, so feel free to make some and sell them, I’d love to see people playing it.
The future
With the simplest version now mostly finished, I have a few plans; either make a tutorial about soldering it together then putting it in a case, or build a more advanced Rev 2 version. If I go straight to the Rev 2, then I’ll add a case tutorial after that.
The Rev 2 version would have an analog filter, analog distortion and a digital delay (all fun things). Using an analog filter would also mean we could get rid of the digital filter, freeing up two more pots for something else (full ADSR?). It would also solve the problem of the LFO affecting the digital filter.
Further into the future I’d like to make a polyphonic version and an FM Synth. For these we’ll need a more powerful micro-controller (about £20), but we’ll also be able to add more pots.
At the rate I move, this should be within the next 20 years.
Cheers!
Previous Parts
Part 3 – Adding a Low Pass Filter
Part 2 – Adding an envelope to our synth
Part 1 – MIDI controlled Oscillator with Wave switch


