Installing A New Hard Drive
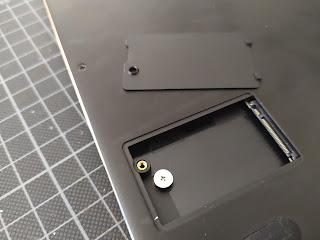
I decided to keep Win 10 on it’s 32gb eMMC disk, and install Kubunto Linux on a new SSD. First you’ll need to find the correct size SSD, as it uses the slightly smaller 4.2cm size.
 |
| Transcend SSD |
I went with a transcend M.2 420s 120gb drive – mainly because it was cheap (25e) and also because there wasn’t much choice with this size drive. Remember only a 4.2inch drive will fit, which sell under the spec 2242 (the 42 at the end being the 4.2cm), a larger 2280 drive will be too large (as I found out the hard way).
 |
| Just open the bottom and insert the drive – sticker side facing outwards |
Installing a Linux USB Boot Disc
The second problem I faced was installing Linux – there’s no full sized USB port, and you can’t seem to boot from the micro-sd card port, so I had to go on eBay and order a USB-C to USB-A adapter;
 |
| You’ll need one of these |
I downloaded Kubunto Linux 64-bit from the website (v 19.xx) and created a USB boot disc using Rufus USB creator. I think the only option I changed during this was to set the file system as NFTS rather than fat32. Then connect the usb pen drive to the adapter, then to the laptop.
Turn the laptop on, and when you see the coda boot sign, start tapping delete to enter the BIOS;
 |
| To enter the bios – Press the delete key a few times on the boot screen |
CODA Wave Bios Boot Set-up
 |
| The new boot options screen |
From here you can now boot into Kubunto, Windows, or into the BIOS. When you boot into Linux you’ll see how much more responsive the laptop now is compared to Windows 10.
Happy computing!


